Monday, October 31, 2011

Happy Hauntings Haunted House - 2nd Year!

I made this haunted house last year out of the Happy Hauntings cartridge.  It took a few hours to cut and assemble and I loved it so much I didn't have the heart to toss it.  I stored it in a cabinet in hopes that it would survive a 2nd year.  Guess what?  It did!  I must have used some really heavy duty cardstock!

In Arizona it gets really hot.  I think the heat melted the tape off the cardstock.  Oh well...some simple tacky tape will fix this!  Off to go do some minor repairs! 


Happy Halloween - From Our Home to Yours!

Happy Halloween from our home to yours!

Sunday, October 30, 2011

Just Married Cards - So Simple!

In just a few short days - I'll celebrate my anniversary!  I think I'll post a few cards to celebrate! Here's a card front that I swapped for on the Cricut message boards.  It  has a cute charm on it pretty embossing.

Again - I have to say that I just love simple easy cards.  Here's a cute one that says Best wishes.  It's 4 squares with stamps and a brad - very easy but oh so elegant!


Saturday, October 29, 2011

Thinking of You Swirly Card

Here's another card front that I swapped for.  There's something really cool about a simple card.  This one has swirls cut out, glued on, and then embossed with the white cardstock. It almost looks like it's a patterned piece of cardstock.  Very cool.  I used an orange base to bring out the colors - I think it works really good!


Friday, October 28, 2011

Stampin Up Playground Card

This card front was given to me.  Apparently my Stampin up friend also trades fronts with her friends.  She had a few extra that she gave to me when I attended her open house.  This is so cute!  I love the way she used the girl as a separate image.  The cuttle bug embossing with the dots pattern is so cute for grass!  I put this front on a yellow base.  It's ready to go!

Thursday, October 27, 2011

Happy Anniversary Flower Card

This is one of the card fronts that I received during my card front swap with some gals over on the Cricut message boards.  I love the tag that comes out to reveal the theme.  I used a pink base to complete this card.

Wednesday, October 26, 2011

Monkey Thank You Card

This is one of the card fronts that I received during my card front swap with some gals over on the Cricut message boards.  This monkey is say'n thanks in a very unique way.  The cuttle bug folder really goes nicely with the circle theme used on the base of this card.  The button adds an extra touch of flare.


Tuesday, October 25, 2011

Falling For You Card

This is one of the card fronts that I received during my card front swap with some gals over on the Cricut message boards.  I really liked how the artist used simple hearts to create her theme. The yellow base I used really brings out the red in this card.  A great card for anniversaries or valentine's day!

Monday, October 24, 2011

45 Cards and 6 Layouts in 6 Hours....

So how did I complete 45 cards and 6 layouts in 6 hours?


By cheating of course!
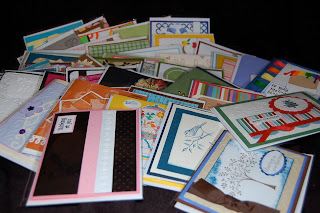
I participate in a monthly card front swap where I make 10 card fronts and swap them with other gals.  Well...I actually make about 15 because I keep 5 of my own for myself.  Then each month I receive 10 different fronts.  It's a great way to have a variety of different cards in my stash. Well...I had about 45 of these fronts sitting on a shelf for that special day that I would actually make cards out of them.  Well...that day was Sunday! I managed to put all of the fronts on matching card stock in about 5 hours. Then I went on to complete 6 layouts that I had previously "started".  There's nothing like finishing a project!  Or in my case....51 of them!

I'll be posting each card over the next few months for you all to see. Be prepared!

Thursday, October 20, 2011

Halloween Party Favors

We're getting ready for our Halloween party. My mom stayed over the weekend and while she was here she helped me make the party favors. I used all the cello bags (I think they're 1 inch) from stampin up and filled them with Hot Tamales, M & Ms, and Skittles. Then I cut out a 1" circle and stamped the bat from Itsy Bitty stamps and attached it to a scalloped circle.


We made 200! I'm sure the kids will love them!


Sunday, October 16, 2011

Magnetic Magazine Tags or Bookmarks

I was challenged to use my scraps this weekend so I decided to make some of these really cool magnetic bookmarks. I entered these in the DYSU scrap challenge

A few weeks ago at bible study my friend had similar bookmarks in her bible and easily referenced pages during our study.  I asked her if I could see them and took a mental picture of them. Then I came home and made them with my Cricut. Instructions are below.


I used thin magnets to keep the thin profile.


1. Using George and Basics shapes cartridge cut 2.25" curved rectangles.
2. Fold in half.
3. Attach magnets to the backside.
4. Place in book!

I tried decoupage, thin tape, and laminate to cover the front for durability, but ultimately decided they were so easy and cheap to make that it wasn't necessary and didn't add much value to the end product. I think these would make super craft fair items. My friend paid $4 for 8 tags at the local box store.

Saturday, October 15, 2011

Halloween Flower Wreath - Art Philosophy

Here at the Rollins' house we love Halloween.  I started making this wreath in September so that I would have it ready by Halloween.  It took me over 10 hours to cut, roll, and glue all of these flowers.  The cartridge I used is called Art Philosophy. I ordered it from my CTMH consultant. I think this is the reason why I purchased this cartridge! I think it turned out very nice.  I hope you like it!
I believe there are over300 flowers on this wreath. They are cut at various sizes ranging from 3-4". Then rolled and glued and pinned to a foam wreath.

Wednesday, October 12, 2011

My Fireplace is Haunted

Yup...it's haunted...someone call the exterminator there's spiders and rats in my house!
I made this scene from items I picked up from the dollar store. I think it ran about $20 for all of the items. Then I put together this pennant with very scary faces to really set the tone. The pennant is made from the Cricut Art Philosophy and Pumpkin Carvings cartridges.

Close up of the pennant.


Close up of the scary fireplace - Bwah ha ha ha!

Monday, October 10, 2011

Halloween Banner - Cricut Contest 2011

Here is the banner that I made for the Cricut Banner contest in September. Thanks for all of the sweet compliments on Facebook :) The instructions are below:
Instructions:
  1. Cut 6 Pennants - 6" (Art Philosophy Cartridge)
  2. Cut 1 of each of the following - 6" from Pumpkin Carvings Cartridge (You'll use the negative - i.e. the stuff you usually throw away):
    1. Square Dracula (for witch eyes and nose)
    2. Square Skeleton (for skeleton)
    3. Square Happy Pumpkin (for candy corn)
    4. Circle Mummy (for mummy) - cut to size
    5. Circle Frankenstein (for Frankenstein) - instead of 6" use 7 3/4" for this one
    6. Circle Dracula (use the eye brow for the witches mouth)
  3. For Frankenstein's bolts - cut 1 Frankenstein layer 1 Italive-s at 6" real dial size from Mini Monsters Cartridge
  4. From Happy Hauntings Cartridge cut:
    1. For Pumpkin - cut 1 Pumpkin 2 -s at 3" for top of pumpkin and layer1 pumpkin 1-s for eyes and mouth  
    2. For Witches Hat - cut 1 4" witch hat (you may want to play with the size here)
    3. For Dangling Spiders - cut 6 at 1 1/2" real dial size Witchhat-s For letters - cut 1 1/2" from
  5. Use Red stickles for cricut letters
  6. Use Yellow, orange, and frost stickles for candy corn - I just put some random dots all over
  7. Use green stickles to accent the eyes of the witch, pumpkin stem, and Frankenstein eyes
  8. Use orange stickles to accent the pumpkin's eyes
  9. Use black stickles to accent the dangling spider on the witches hat
  10. Use black ink to distress the skeleton 
  11. Thread the ribbon through the pennant holes
On a side note the Happy Haunting Cart has some really great faces on page 100 - the 3d pumpkin faces. I probably would have used these faces had I seen them in time. I could have omitted the Mini Monsters cut just by using the Frakenstein pumpkin located on this page. Oh well - live and learn.

I hope I got the measurements right - I did an awful lot of cuts and tried to inventory as I was cutting - have fun!

Here are some close ups so you can see the detail:


Friday, October 7, 2011

Hot Dog - It's Your Birthday! Birthday Card

I was lucky enough to have a month to explore the County Fair cartridge while my mom was away on a trip. Unfortunately when she came home, I had to give it back. Iwas in the middle of making these cute cards when she came over. I thought I had enough cuts...but I was wrong (read on to find out how I fixed the error of my ways).
Corn dogs from County Fair cartridge are cut at 3"
Hot Dog Sentiment from Paper Pups cartridge is cut at 2"
I used stickles to add a little extra to the card.
The sentiment inside is from a stamp I found at the Dollar Tree.


Well, like I said...I ran out of corn dogs in the middle of my project. I was in a pickle. So I grabbed the Paper Pups cartridge and started to look for some dogs that looked like they were hot and mad.  Here's one holding a rifle - he looks pretty darn mad!  I absolutely love how this card turned out!


Wednesday, October 5, 2011

Fall Leaves Easel Card - Art Philosophy

I love the CTMH Cricut Art Philosophy cartridge. Almost every card in the cartridge can be made into an easel card easily. Here's one that I made for fall. All of the stamps are from CTMH.
Here's a 2nd card - very similar to the first one.

Tuesday, October 4, 2011

Halloween Boquet of Monsters

I love how this boquet of monsters turned out.  I used Pumpking Carvings and Mini Monsters cartridge to make all of the cuts. Then I stuck them in a glass vase filled with candy corn. Yum!  I'm sure it would be a hit at any party or office.


Monday, October 3, 2011

The Baker in Me

Spent my Sunday crafting and baking after church. You see when I see that my banannas or veggies are exiting this world, I chop them up and freeze them before the they leave. That way I can use them in recipes when I get around to it. I am a very busy lady so baking is a treat. In fact, my hubby said that he's willing to take a second job just so I can quit mine and stay home and bake.  He was so happy with the treats I made:
2 - Bananna Nut Bread Loafs
2- Zuchinni Bread Loafs
12 - Bananna Nut Muffins
11 - Pumpkin Spice Muffins
They all came out very yummy! Gotta love the Betty Crocker cookbook.
And yes...those are my favorite salt and pepper shakers...Twiddle Dee and Twiddle Dum.
You shake the salt and pepper out of their butts!

Sunday, October 2, 2011

In This Home - Vinyl Wall Decor

I'm so excited about how my vinyl wall art turned out. It's so professional - but even better it was about about $5 instead of around $30 online. Plus - mine says we love Jesus - which makes it even more unique and special.
I created this using my Gypsy. entire size is a bit over 24" x 12". 
I used my super big Cricut mat to cut the word collage - all in one try.
The scrolls were an after thought, so they were cut separately.
The cartridges I used include:
Home Decor - for the scrolls
Storybook - for Home and Jesus words
Gypsy Font - for all of the "We ..." phrases
A Child's Year - for the other
I just moved the words around and adjusted sizes to make them fit on my mat.
I cut the vinyl using 6" blade depth and med (#2) pressure.
After it was cut, I weeded the extra vinyl off the mat.
Then I applied the transfer tape.  That was a sticky situation - LOL!
Pulled the transfer tape off, which brought the vinyl up with it.
Then, I applied it to the wall.

Now....if I make more of these...I can convince my hubby that my Cricut hobby actually does save us money!  So far - he's not convinced!

Saturday, October 1, 2011

7 Days of Craft Fair - Day 7 - Purse Charms

Purse charms are a unique item that will set your booth a part from the rest.
You'll need swivel clasps to start. Then you can add a variety of beads and charms to make a unique creation. I think I went a little overboard on mine, but you get the picture.

Today's Craft Tip: Put a bowl of candy on your table. It attracks shoppers, and many people feel obligated to buy after they've indulged in your free treats!